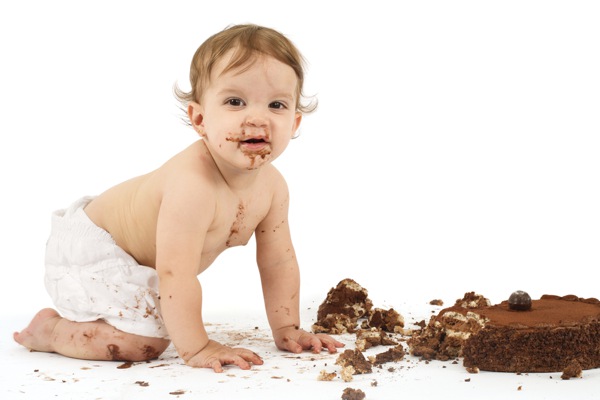
For some parents, creating a multi-tiered cake model of Elsa from Frozen or Scoop from Bob The Builder is an almost effortless endeavour. Their creations regularly feature in school and toddler group bake sales and are universally admired. However, for many of us, the reality of creating a birthday cake to a child’s stipulations involves fruitless attempts at patching up icing cracks, carving off burnt patches of cake, and lots of sorrows requiring copious amounts of wine. If your attempts at creating the perfect birthday cake for your son or daughter are more half-baked than Bake Off standard, then read on, as we have plenty of tips that may help.
Baking The Cake

If you are a novice baker then it’s best to keep things simple. A simple sponge can be cut into a variety of shapes and is fairly easy to make. You don’t even have to follow a set of measurements in a recipe. Instead, simply weigh your eggs and use that as a measurement for the rest of your ingredients. A standard 8 inch cake tin will need a four egg recipe, therefore, if your four eggs weigh 200 grams, then you will also need 200 grams of self-raising flour, 200 grams of butter or margarine, and 200 grams of caster sugar.
Beat the butter and sugar together first, add the beaten eggs a bit at a time with a spoonful of flour, then fold in the remaining flour. Alternatively, if you have a food mixer or electric whisk, go for the all in one method and mix everything together at once. Bake in the oven at 180 degrees (160 for fan ovens) for about 20 -25 minutes, longer if your cake tin is deep. Your cake is cooked when the mixture springs back into position when gently pressed.
Cake Baking Tips

For larger cakes, follow this simple rule. For every 2 additional inches add another egg and the corresponding weight of other ingredients. Therefore, a 10 inch cake needs 5 eggs, a 12 inch cake needs 6 eggs, etc. Remember that the larger your cake, the longer the cooking time.
Make sure both your butter / margarine and eggs are room temperature before you start to bake to prevent your mixture from curdling.
If you are making a coloured sponge, use gel colours rather than liquid colours for a more vibrant effect. Liquid colours are generally not bake stable and therefore will fade or fail completely once the cake is cooked. However, you should also note that gel colours tend to be filled with E numbers that have been linked with hyperactivity in children. Of course, if it’s for a birthday party, they are probably hyperactive already!
Don’t spend a fortune on a cake mould, especially if you are going to use it as a one off, such as a number mould. Many specialist cake decorating shops hire out cake moulds for a small fee, so it’s worth checking if there is one near you that offers this service.
Line your cake tin with greaseproof paper to help prevent the edges from burning. Double up the lining for larger cakes.
Be aware that oven temperatures should be used as a guide. You may find that your oven needs to be set higher or lower to bake the perfect cake. If your cakes are coming out with a peak rather than a good rise all over, then it could be that your oven is too hot.
Baking powder and bicarbonate of soda (baking soda) both become less effective over time, so if your cakes are not rising well, it could be time to get new baking powder or self-raising flour.
Icing The Cake

Royal icing or fondant? Buttercream or Ganache? Throw modelling and flower paste into the mix and you have a large range of options that can cause confusion to a baking novice. To help you choose the right icing for your cake, we have listed the different types here, complete with tips on how to use them.
Royal Icing
Royal icing is traditionally made from egg whites and icing sugar, although you can get ready to mix packets that contain egg white powder and simply require water to prepare. Royal icing dries hard and is usually found on wedding cakes and Christmas cakes. It can be smoothed into a flat finish, or peaks can be created to represent a snowy scene. It can also be used to “glue” together gingerbread houses, or coloured with gel pastes and piped onto biscuits for decoration. Consistency is key with royal icing, and you will need plenty of practice to achieve the perfect finish.
Fondant / Sugarpaste / Ready To Roll Icing
Fondant icing, also known as sugarpaste or ready to roll icing, has a softer texture than royal icing, and can be manipulated into a variety of shapes. You can buy packets of fondant in most supermarkets, including some that is already rolled out and ready to place directly on a cake. Alternatively, you can make it at home, either with a packet mix or using a recipe that either uses marshmallows or gelatine and glucose syrup. However, you normally need to make the fondant 24 hours in advance in order to achieve the best results.
If you are using fondant to decorate your cake, then you will need to completely coat your cake in a layer of buttercream icing first (known as a “crumb coat”). Keep the fondant fairly thick when rolling it out (about 1cm) as this will reduce the likelihood of the fondant splitting. The fondant can be smoothed with a cake smoother to create a flat finish.
Fondant dries out quickly, so speed is essential. You can add a white vegetable shortening to it, such as Trex, if it becomes too dry when you are rolling it or making shapes for decoration. Don’t add water as this will make it too sticky to work with.
If your fondant cover becomes cracked, or you dent it with a fingernail, etc., then you can make a paste that can be used for repairs. Mix a small amount of the fondant in a bowl with a small amount of water to make a tooth paste consistency. Use a (clean) paintbrush to apply the paste to the offending areas.
If you want to make 3D models with fondant, then it’s a good idea to add some Gum Tragacanth (available in most specialist cake decoration shops and online), as this will help stiffen the fondant and your models will retain their shape. Add a teaspoon of the powder to every 250g of fondant and knead well before use. This will cause your fondant to dry out even faster so you need to work fairly quickly. Alternatively, you can use ready-made Mexican Modelling paste, which is also better for more intricate modelling work.
Butter Icing / Buttercream
Buttercream, also known as Butter Icing, is made simply by beating together butter and icing sugar. A simple and easy to remember recipe is to use double the weight of icing sugar to butter, for example, 50g of butter and 100g of icing sugar. You can add a small amount of milk to help the ingredients combine better if required. Add vanilla extract or a small amount of melted chocolate for flavour.
Buttercream can be used as both a filler and for decorating. A layer of buttercream over your cake is essential before covering with fondant icing as it helps the icing to stick and smooths out any cracks etc. in your cake. Alternatively, buttercream can be coloured with food colour liquids or gels and piped onto your cakes in a variety of patterns.
Ganache
Ganache is an indulgent chocolate icing that has a glossy finish. Ganache is made by pouring hot double cream onto chocolate chunks and mixing it together. The mixture can then be poured onto cakes for a glossy coating, or allowed to cool slightly before applying with a swirl affect. It can also be allowed to cool completely and then whisked up to make a delicious chocolate filling. When making ganache, chop your chocolate up into fairly small chunks to allow them to melt quickly.
Cream Cheese Frosting
Cream Cheese Frosting offers an alternative to buttercream that doesn’t taste as sweet. It’s traditionally used as a topping for carrot cake, but it goes well with virtually any other sponge cake, especially if you prefer your deserts less sweet. It’s made by combining icing sugar, butter, and cream cheese to get a thick icing that can be spread or piped onto cakes. When making cream cheese frosting, make sure your butter is room temperature and your cream cheese is used directly from the fridge for the best results.
Sugar Flower Paste
Sugar Flower Paste, or Florist Paste, tends to be used more by professionals. It is a very fine paste that dries very hard and is used to create delicate petals for sugar flowers that are then used to decorate cakes. Florist Paste can be coloured using paste colours and is often used in combination with non-edible items such as wiring and tape to create elaborate bouquets. You can find plenty of tutorials online that will teach you the basics of sugar flower craft.
Decorating The Cake – Tips And Ideas

Once you have made your cake and chosen your icing for the cover, it’s time to decorate. It’s a good idea to plan your cake in advance so that you can have all the colours, cutters, etc. ready for when you need them. For inspiration, check out Pinterest or Google Image Search, you will find lots of ideas here. You can also find step-by-step tutorials on YouTube for a variety of character and themed cakes. Meanwhile, the keen bakers at Mumblog have put together our favourite cake decorating tips.
Combine A Present With A Cake
Rather than spend hours on elaborate models, why not consider using toys as decorations? For example, if your child loves superheroes and Lego, then items from a themed set would make for a great cake topper. Add some coloured icing, fondant boulders, etc. for a complete look. It’s only cheating a little bit! Look for mini figurines of your children’s favourite characters. Not only does your child get a great looking cake, but an extra present as well.
Print An Edible Photo
Another quick “cheat” is to get an edible photo printed up to use a cake topper. Searching “Edible Photo” online will give you plenty of companies offering the service. Alternatively, many local specialist cake decorating shops also provide a printing service.
Rice Krispie Treats For Modelling
If you want to construct a castle or a train, etc. then consider using Rice Krispie Treats for constructing some of the parts. Created by blending Rice Krispies, melted marshmallows and butter, the mixture can be moulded into shapes such as blocks or cylinders to be used to form your cake. It’s much easier to create shapes from the mixture than it is to cut sponge cake into the required shape. Rice Krispie Treats can be covered in fondant in the same way that sponge can, using a very thin layer of buttercream to enable to the fondant to stick.
Keep Your Models Seated
If you do decide to go all out and make your own fondant figurines then the easiest way to do so is to have them sat down. Making a model that stands, and stays standing until the cake is served, is incredibly tricky, even for seasoned cake decorators.
Coloured Coconut
If you want to create a grass or sand effect, then you can use coloured desiccated coconut. Simply put the coconut into a sandwich bag, and add a couple of drops of liquid food colouring. Give it a good shake and massage the bag to work in the colour. Use buttercream to stick the coconut onto the cake.
Ribbon Cutting Tool
A ribbon cutting tool enables you to make fondant ribbons of various sizes with ease, giving you a nice even size along the length of the ribbon. There are products available that allow you to create various patterns on your fondant as well.
Make Use Of Sweets and Pastries
Rather than spending hours making intricate decorations, use sweets and mini pastries instead. For example, liquorice strings / shoelaces can be used for a fire engine hosepipe or to create patterns such as a spider web. Dolly mixture can be used to create a colourful brick effect, whilst smarties and chocolate coins can be used as a filling for a pirate treasure chest. Chocolate covered mini donuts make great wheels, and jelly beans look fab when used to fill the trailers of a train cake.


